
In this Video we will be setting up the Sonoff RF Bridge the Home Assistant. I will show you what you need and all the steps to take your Sonoff RF Bridge, including flashing with TASMOTA, to get ready for use with Home Assistant as well as talk about the good and bad of using RF 433MHz.
Flashing Software
Flashing Tool for Mac: nodemcu
Windows: nodemcu
Tasmota Firmware
https://github.com/arendst/Tasmota/releases
Flashing with Windows (Not shown on Video)
In the video, I take you through flashing the RF Bridge with my Mac. In windows there is different software tool (nodemcu for windows). It’s pretty simple to use, but just in case, I’ve added some screens below.
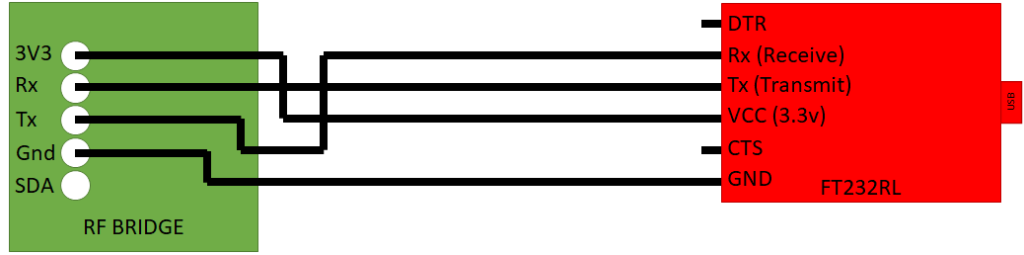
Connection Diagram of Sonoff to USB adapter:
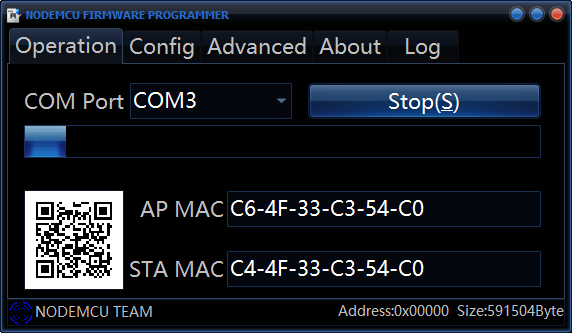
Your COM port should automatically select itself, but I find if you open the software before plugging in the device, you’ll see it pop up, and that way you’ll know what com port number it is.
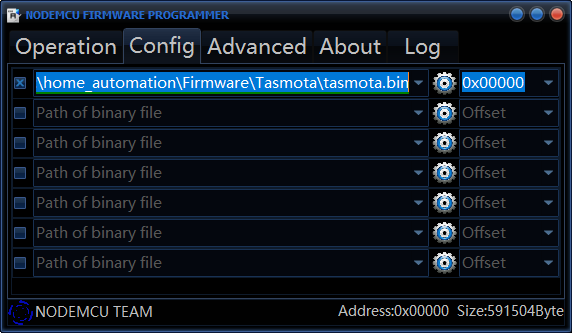
Select your Tasmota.bin file you’ve downloaded by clicking the “cog” on the first line.

Make sure the settings are shown as above. Then head back to the “Operation” tab and hit Start. It should only take a minute.
Note: Make sure you have a cross-over between Tx and Rx i.e. – RF Bridge Tx is wired to Rx on the USB to TTL